1. Introduction
This tutorial introduces the Julia programming language and its applications in spectroscopy. It is written for readers who have never programmed before, or who have only programmed a little in another language. The goal is to teach the basics of programming in Julia and to give worked examples of using Julia for data analysis and visualization in spectroscopy. It is not meant to be a comprehensive introduction to Julia, but rather a starting point for using Julia in your own research projects in spectroscopy.
Getting started
Section titled “Getting started”What is Julia?
Section titled “What is Julia?”The Julia programming language is a high-level, general purpose programming language designed for high-performance numerical and scientific computing. It is by default a just-in-time (JIT) compiled language, meaning that it compiles code as you need it.
The Julia community is small, but it has found a niche in scientific computing. It is used by CERN to analyze data from the Large Hadron Collider, and by the NASA Jet Propulsion Laboratory for modeling spacecraft and data analysis. It is also used by many pharmaceutical companies for drug discovery and development.
Why use Julia?
Section titled “Why use Julia?”There are a lot of software options that can be used to analyze data. Why even learn a programming language? First, programming languages are much more powerful than GUI based programs or spreadsheets. They allow you to automate repetitive tasks, and to write code that can be reused in different contexts. They also allow custom analytical solutions to be developed, and to be shared with others. Programming languages are also much more flexible than GUI based programs or spreadsheets. I choose the Julia programming language in particular for several reasons:
- It was designed numerical and scientific computing from the start and has a robust collection of scientific libraries.
- It is easy to learn, borrowing good ideas from Python, Lisp, and others.
- It is responsive and interactive. It can be used in Jupyter notebooks or in the REPL (Read Evaluate Print Loop) in the command line. The VS Code extension for Julia also provides an interactive environment for writing and running code.
- It uses modern technologies (JIT and LLVM) and was designed for performance from the start. It is fast, comparable to C or Fortran. So if performance is your goal, you can stick with Julia and do not need to learn a second language.
- Scientific software can be very expensive. Julia is free, open source, and has a helpful community.
- Reproducibiliy is a priority, and Julia has a built-in package management system that makes it easy to share code and reproduce results. This is essential when designing code for science.
- I was sold on the excellent plotting library, Makie.jl. It is fast, interactive, and has a clean API.
What is Visual Studio Code?
Section titled “What is Visual Studio Code?”Visual Studio Code (VS Code) is a free, open source code editor developed by Microsoft. It is a lightweight, cross-platform code editor that supports many programming languages, including Julia. We won’t cover all of the features of VS Code, but I encourage you to explore it on your own and check out the documentation for videos and tutorials. There are also language-specific tutorials available, including for using Julia in VS Code.
Install Julia and Visual Studio Code
Section titled “Install Julia and Visual Studio Code”- Install the latest version of Julia following the instructions on the official website.
- Download and install Visual Studio Code.
- Install the Julia extension for Visual Studio Code by searching for “Julia” in the Extensions Marketplace.
We will first use the Julia REPL (Read-Eval-Print Loop) in the terminal. VS Code will be used later. There are many code editors available, but we will use VS Code because it is free and widely used for many programming languages.
The Command Palette
Section titled “The Command Palette”Briefly explain the command palette and how to use it in VS Code.
Exercises
Section titled “Exercises”- Open the Julia REPL in the terminal by typing
juliain the terminal. - Type
versioninfo()in the REPL to check that Julia is installed correctly. - Your first program in Julia: type
print("Hello, world!")in the REPL to print “Hello, world!” to the console.
Files, folders, and environments
Section titled “Files, folders, and environments”This section reviews files and folders and gives a short tour of Visual Studio Code. You will create a project folder to hold the tutorial code and any future experiment code, which keeps data storage and analysis practices consistent over time. We also cover Julia environments and how to create a new one for each project — important for reproducibility and avoiding package conflicts.
Files and folders on a computer
Section titled “Files and folders on a computer”On a computer, files are stored in folders (directories), where a folder can contain both files and other folders. We want to store files and folders in a way that makes it easy to find things later and to make it easy to write and read complex code. It is important in science to have well-organized data and code for reproducibility.
Follow these steps to create a project folder for your tutorials and experiments:
-
On macOS, go to
~/Documents/and create a new folder calledprojects. On Windows go toC:\Users\<username>\Documents\and create a new folder calledprojects. This is where you will store your projects. -
Inside of
projects, create a new folder calledtutorials. This is where you will store code for these tutorials. (You can make other folders for your own projects later inprojects.) -
Open Visual Studio Code and open the
tutorialsfolder that you just created (click File, then Open Folder… from the menu). -
Click on the new folder icon and make a new folder called
programmingor something similar. This is where you will store code and exercises for the programming tutorial. -
Create a new file for the next lesson in the
programmingfolder calledvariables.jlorlesson1.jlor anything you like.
Here is the structure of your tutorials folder so far:
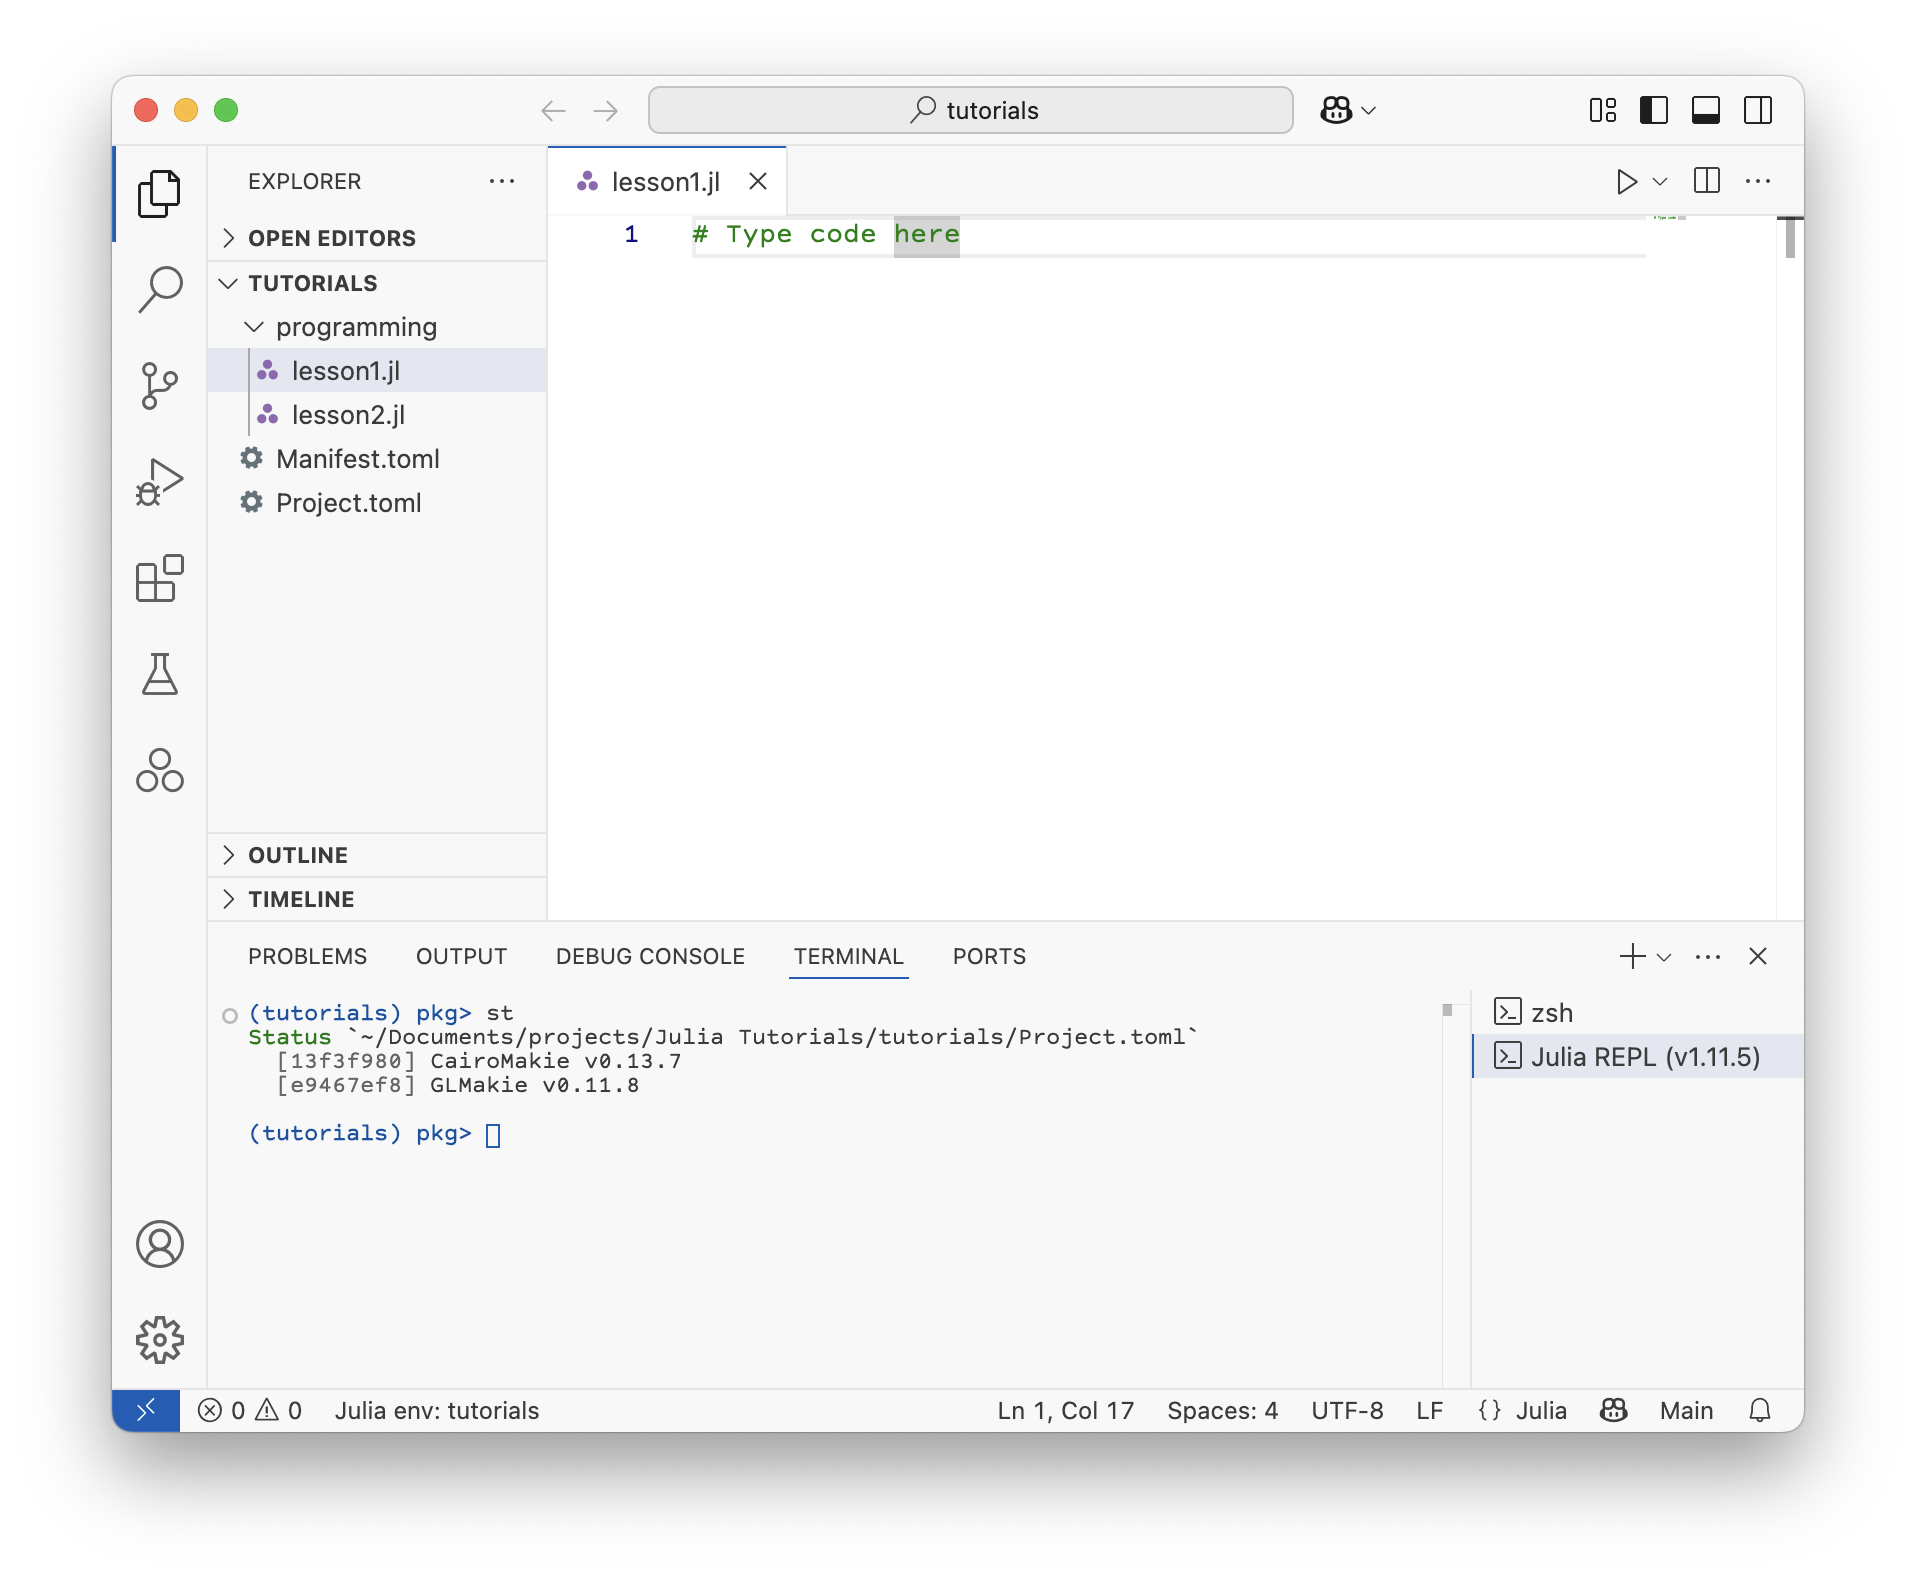
projects└── tutorials └── programming └── variables.jlIn the future, you might have a couple of projects and a structure like this:
projects├── tutorials│ └── programming│ ├── variables.jl│ └── plotting.jl└── experiments ├── FTIR │ ├── data/ │ ├── figures/ │ └── analysis.jl ├── raman │ ├── data/ │ ├── notes.md │ └── analysis.jl └── pump_probe ├── data/ ├── figures/ └── analysis.jlThe exact structure is up to you, but it is important to have a consistent structure for your projects so that you can find things later and so that others can understand your code and analysis.
Environments
Section titled “Environments”Now that you have a project folder, let’s set up an environment for this project.
In Julia, an environment is a collection of packages and their versions that are used for a specific project.
This is important for reproducibility and to avoid package conflicts.
If you do not use environments you may end up with many packages installed that you do not need, and you may have conflicts between different versions of packages.
Then you will have to spend time debugging and fixing these issues, which is not fun.
In Julia, you can use the package manager to create and manage environments.
We will create an environment for the tutorials folder that you created previously.
When you start your experiments, you will create a new environment in a different folder for each project.
First look in the bottom left corner of the Visual Studio Code window. Notice that it say “Julia env: v1.12” or something similar. The first part, “Julia env:”, indicates that you are in a Julia environment. The second part, “v1.12”, indicates the version of Julia you are using. This means that you are using the default Julia environment, which is the global environment. In general, we don’t want to use the global environment for our projects. Sometimes I use the global environment for quick tests, but I always create a new folder and environment for my projects.
Let’s create an environment for the tutorials folder that you made in the previous section.
If it is not already open, open the tutorials folder in Visual Studio Code.
Then let’s create a new environment here, following these steps:
-
Open the Julia REPL in Visual Studio Code via the Command Palette (Ctrl+Shift+P) and find
Julia: Start REPL.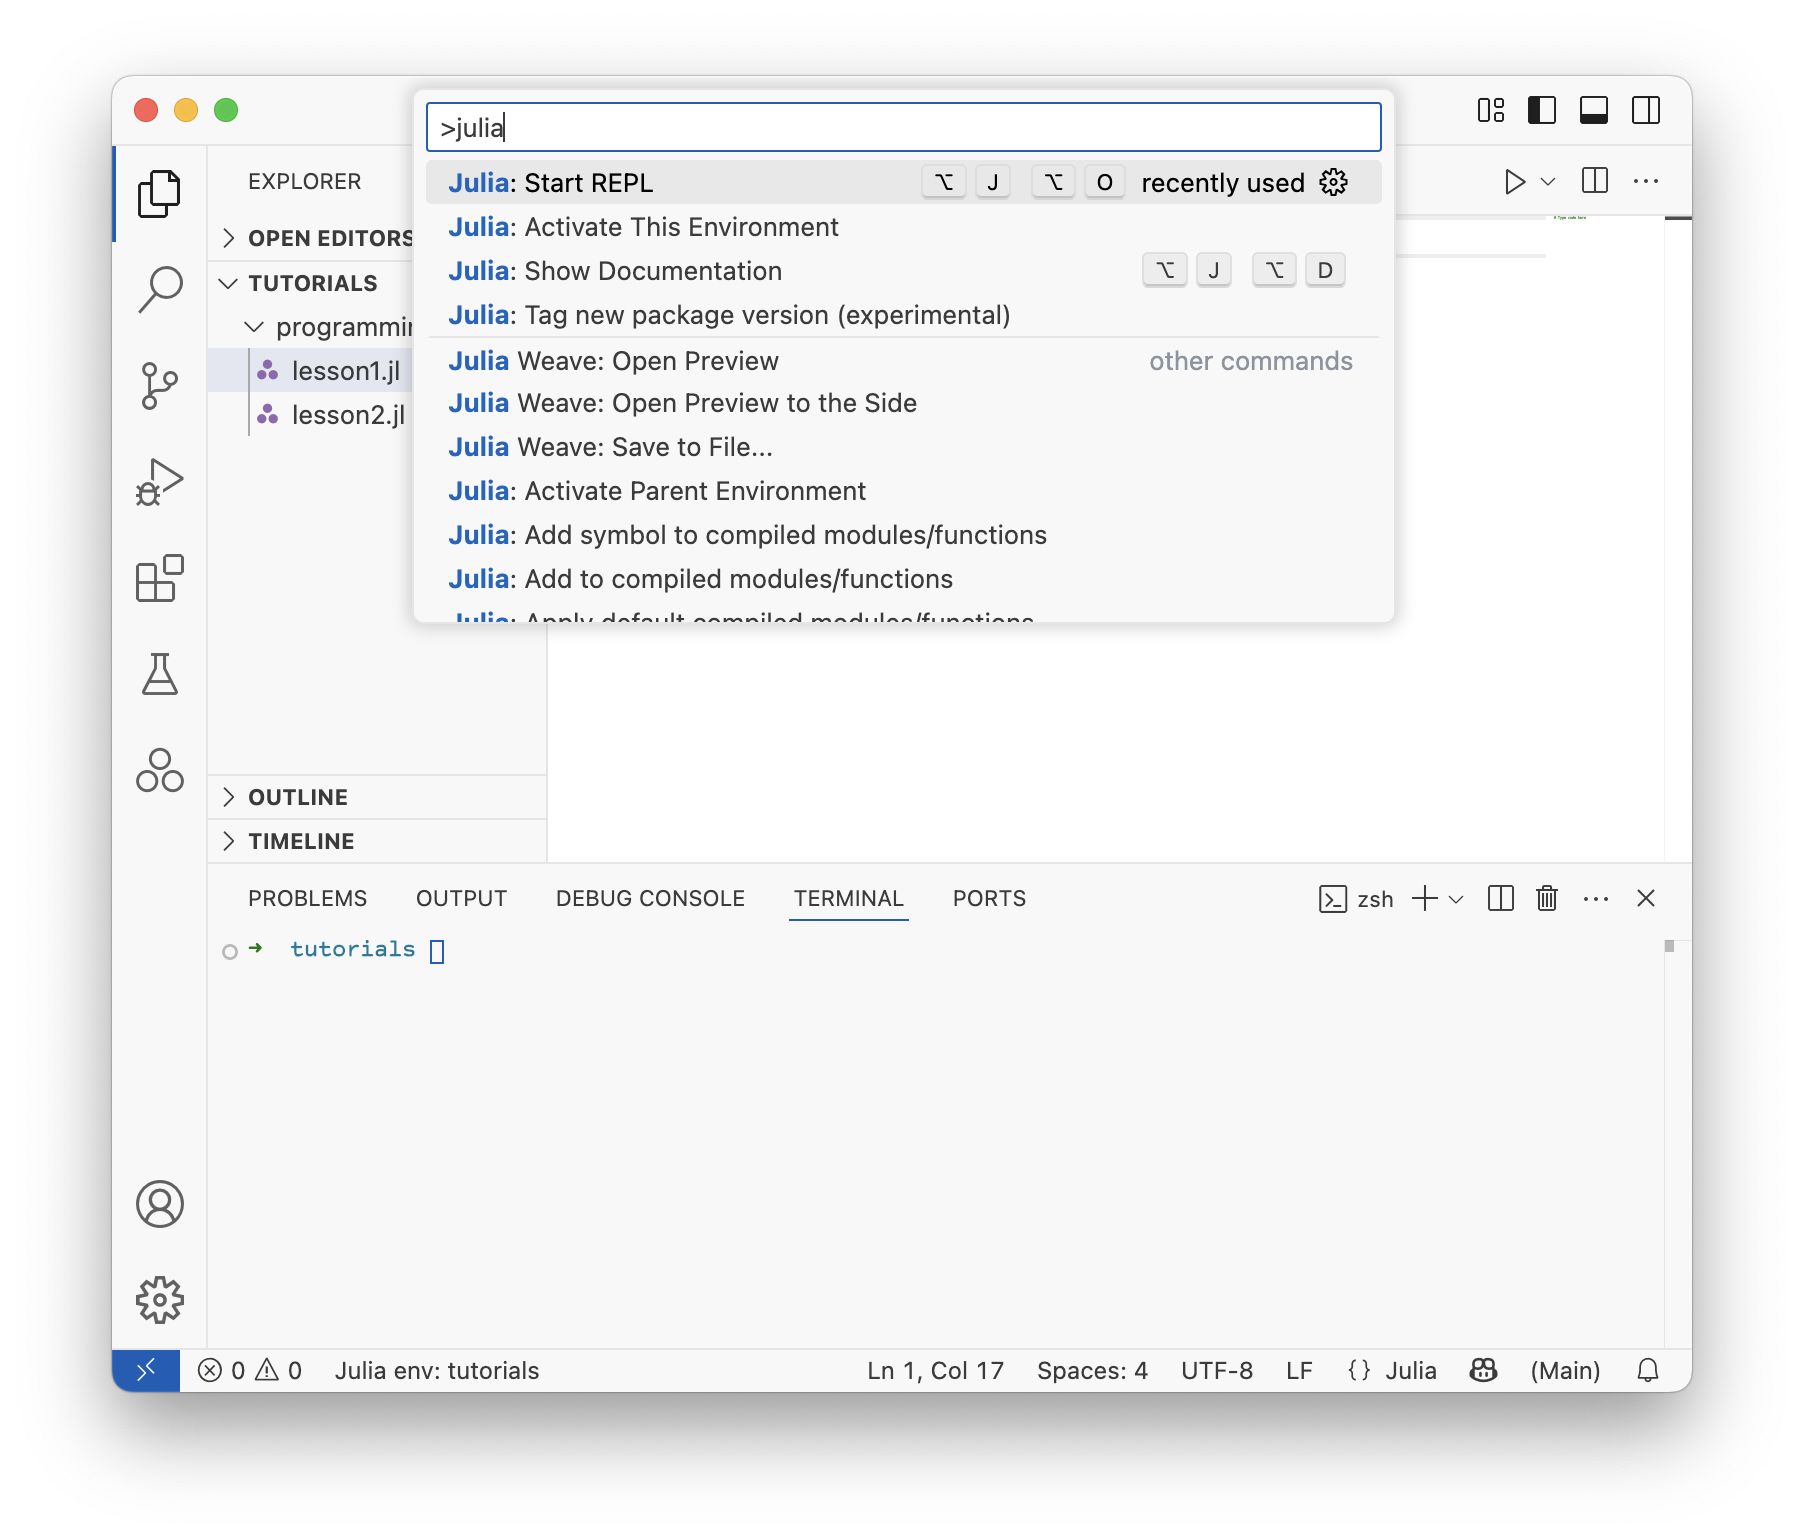
-
In the REPL, type
]to enter the package manager mode. Notice that here too, it says(@v1.12) pkg>or similar, indicating that you are in the global environment. -
Type
activate .to create a new environment in the current folder. (The.means the current folder.) Now it says(tutorials) pkg>, indicating that you are in the new environment. -
Now let’s add the plotting package that we will use later,
GLMakieandCairoMakie. I will explain what these are when we start to use them.
Two new files were just created in the tutorials folder: Project.toml and Manifest.toml.
These files contain information about the packages and their versions that are used in this environment.
This is how Julia keeps track of the exact versions of the packages you are using and ensures that your code will work in the future.
This is important for reproducibility and sharing code with other researchers.
In the future, when you open this folder in Visual Studio Code, it will automatically activate this environment.
Let’s try that now.
Close and reopen VS Code.
The environment indicator in the lower left will say “Julia env: tutorials” instead of “Julia env: v1.12”.
If it does not, click on the environment indicator and select the tutorials environment from the drop down list that appears at the top of the VS Code window.
When Makie and its dependencies have finished installing and compiling, you can type status or st in the package manager mode to see the list of packages that are installed in this environment.
Below is what your environment and file structure should look like after setup.
Exercises
Section titled “Exercises”- Download the Japanese language extension for VS Code.
- Find the setting to change the VS Code theme from the command palette.
- Try to open a folder from the command palette.
Problems
Section titled “Problems”- In your
tutorialsfolder, create a file called “hello_world.jl” and typeprintln("Hello, world!")in the file. Hit Shift+Enter to run this line of code. - Find the documentation for the
printlnfunction on docs.julialang.org. What is its signature, and how does it differ fromprint?